Payment pages offer a convenience way for your customers to pay you 24 hours a day and 7 days a week. A few great ways to leverage the power of payment pages:
- Link on your website: This could be a simple text link that says "Pay Online" or "Pay Now" or a custom button. If your site is built on WordPress and you can share admin access, we offer this customization at no cost to our clients.
- Link in your Email: Set your payment link as part of your email signature with a friendly way of displaying it like "Pay Now" or "Click here to pay your invoice" to give a customer a nice reminder every time they get an email from you.
- Link on Paper Invoices/Mailers: Putting your link on paper invoices is a great way to connect the analog to the digital. Better yet, use a QR code. You can use your own service or take advantage of our free QR program for clients.
Step 1: Create the Payment Page
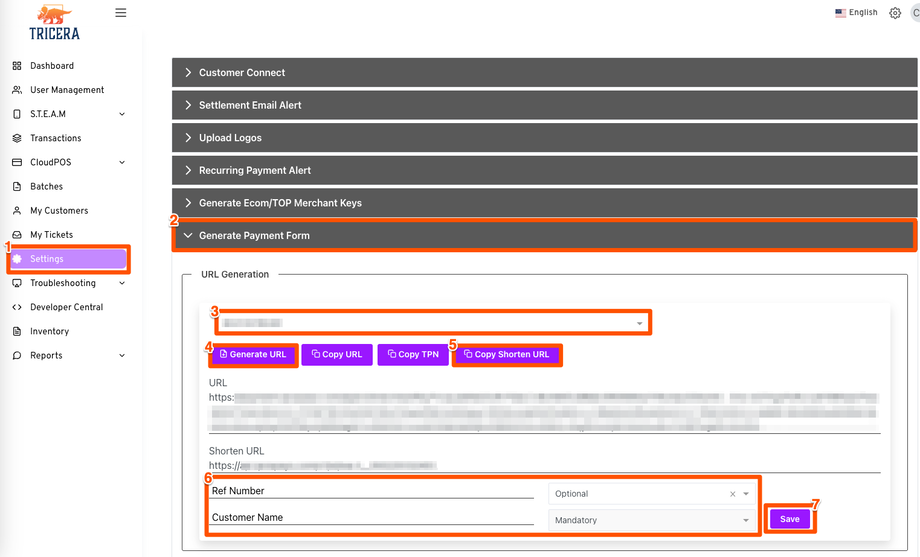
- Go to Settings
- Click Generate Payment Form
- Select the TPN you wish to use
- Click Generate URL
- Click Copy Shorten URL
- Edit the optional field or make it mandatory (eg. Invoice Number instead of Ref Number)
- Click Save

Step 2: Review & Test (Optional)
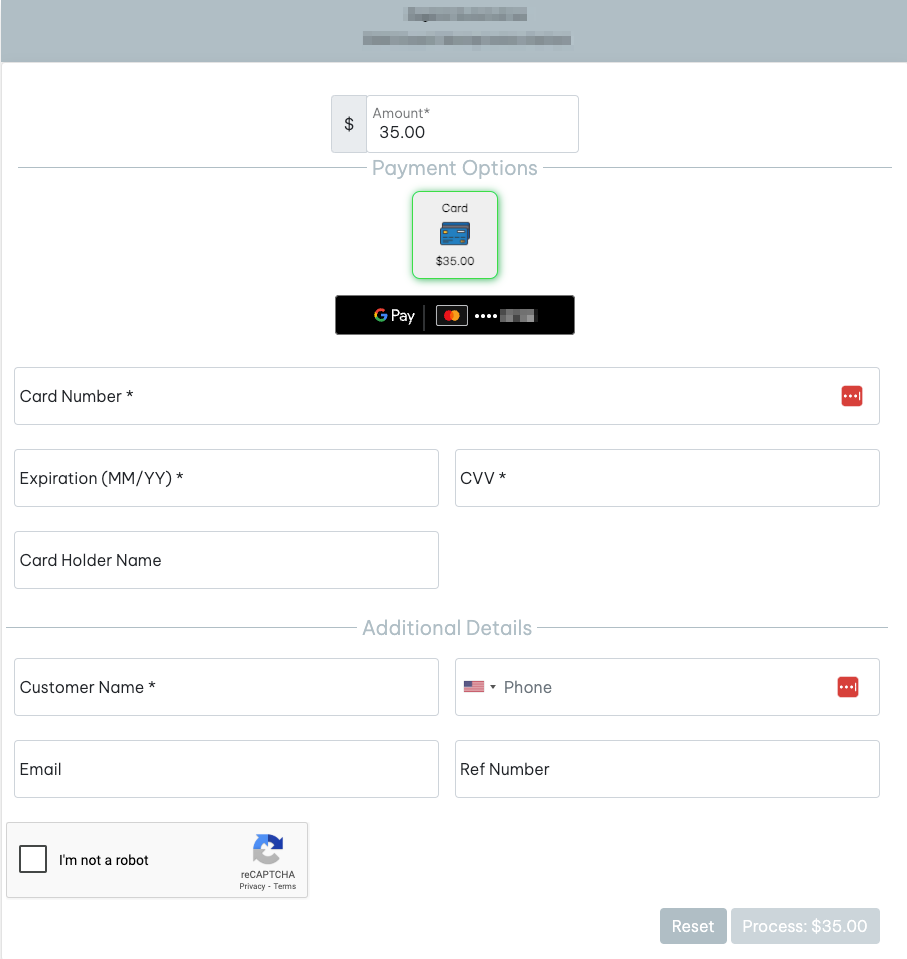
Now that you've adjusted your settings and copied the Shorten URL, you can paste into any browser window to review and test. This is what this one would look like:
Step 3: Enable Notifications (Recommended)
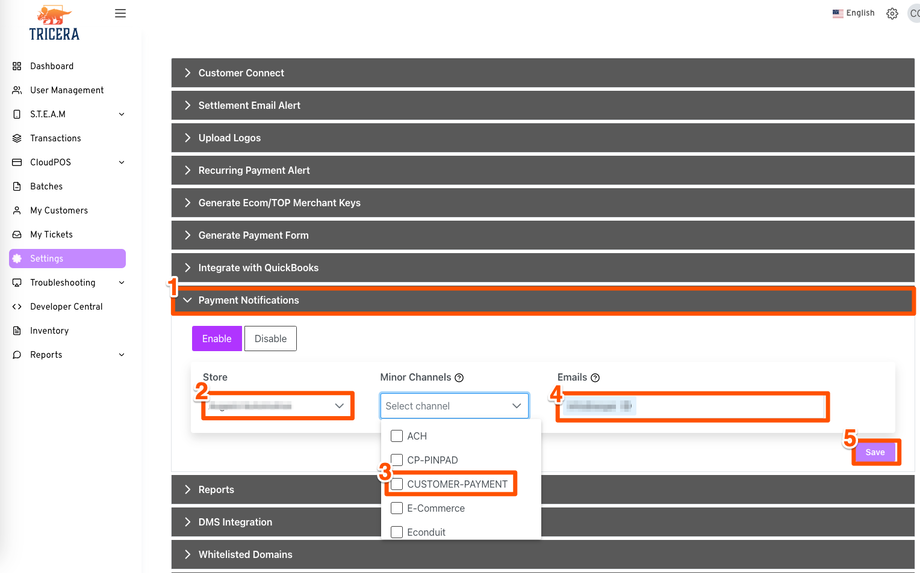
If you'd like to be emailed each time a transaction is completed on the payment page:


