iPOS allows for an unlimited number of users. You may not want all users to be able to do all things. This article will show you how to choose a user role and adjust their individual permissions (what they have access to).
Step 1: Add User
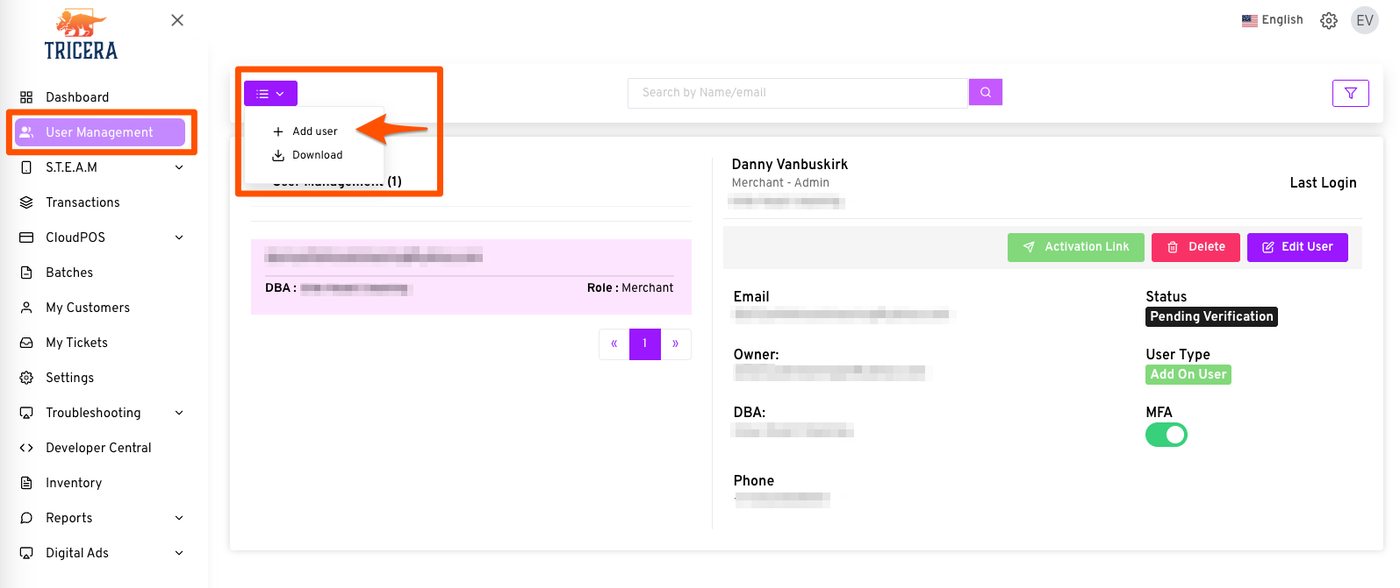
Log into the iPOS portal and go to User Management -> Click the purple box with three lines -> click + Add user
Step 2: Choose Role & Set Permissions
Once you click + Add user you'll be prompted to set your user details. Enter their name, email address, whether you want MFA (they will be emailed a code when attempting to log in), phone number, and select their User Role.
User Roles and what they mean:
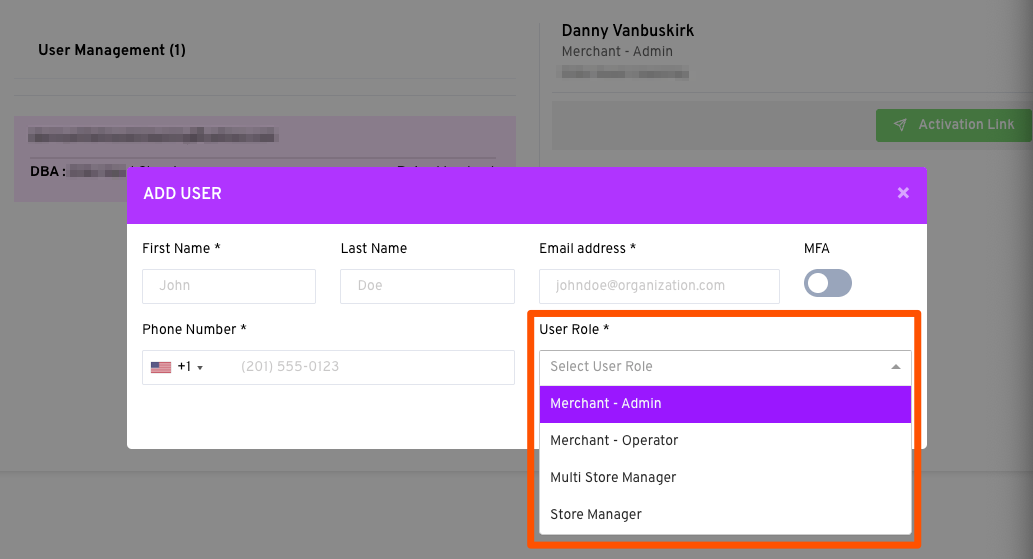
- Merchant - Admin
This role has all the permissions you do as the merchant location administrator. This user will be able to do anything you can do as the owner. - Merchant - Operator
By default this role can run sales, refund processed transactions, view batches, manage inventory and customers, send payment links, and view reports. - Multi Store Manager
Can manage stores you select (if you have multiple stores or locations) during setup. - Store Manager
Can manage a single store you select.
Step 3: Customizing Permissions
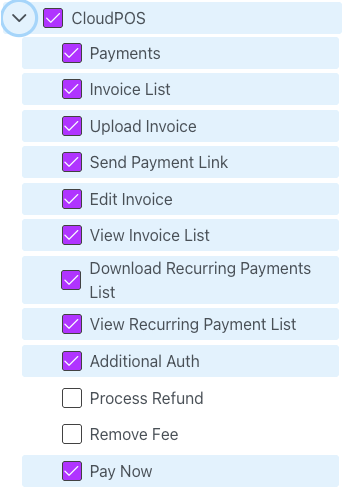
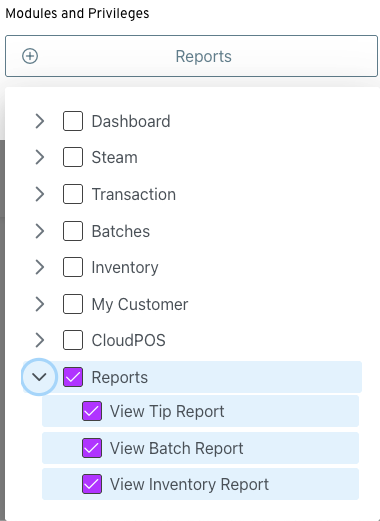
After you select the desired user role, you can customize their permissions by clicking the Modules and Privileges dropdown.

Common Setup Scenarios:
Adding an accountant/bookkeeper user with access to reports, inventory, and tips but cannot process sales or do refunds
Adding a User that can process sales but not process virtual terminal refunds/credits