Overview:
The Hosted Payment Pages feature allows you to create and customize secure payment forms that customers can access to make a payment. The builder will be hosted on a generated URL/link that the merchant can place anywhere they expect their customers to visit.
Building a page:
To create a payment page:
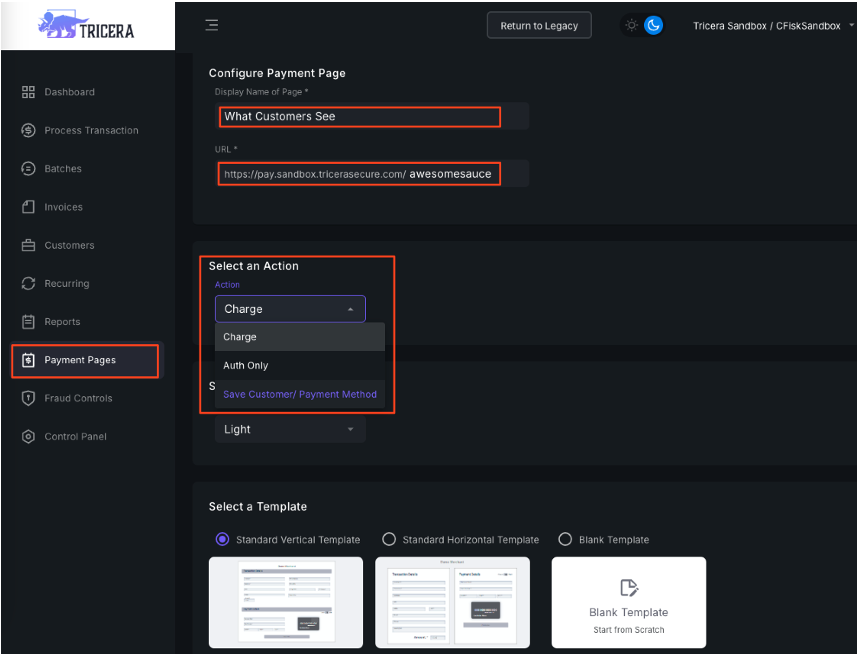
- Navigate to the Payment Pages tab and click New Payment Page in the top right corner.
- Enter a unique name within the Display Name of Page field which will be used to identify the payment page within the gateway (e.g., Tricera BBQ Concert Tickets).
- Use the URL field to create a slug (the last section of the URL).
- The URL will be visible to customers when visiting the Hosted Payment Page.
- The Slug should be at least 5 characters long.
- Choose an action:
- Charge – default, will authorize and capture funds.
- Auth Only places a hold on funds. Transaction would need to be captured manually
- Save Customer/Payment Method Creates a customer record. Customer will not be charged.
- Select a light or dark mode theme.
- Choose a template or create the payment page from a blank template.
- Click Save.
Customizing/Editing a page:
You are more than welcome to edit and manage your own payment pages. If you find it to be complicated or don’t enjoy this kind of thing, please just shoot us an email and we’ll set it up for you: hello@tricera.io.
Once you save your page, you will be directed to the page builder. This is where you can customize the page as desired.
There are two sections that control the page: Blocks and Design.
- Blocks Section: Allows you to add sections, columns, fields, text, images, and more to the page. Simply drag and drop the input onto the page. Under Blocks you will find additional fields such as recurring, surcharge, terms and conditions, custom fields and more which can enhance the capabilities of your payment page.
- Design Section: Controls the appearance of the page, allowing you to customize fonts, size, colors, images, borders, and more.
Highlight the part of the page you wish to alter by clicking on the field, text, or section, and use the Design section to make the changes.
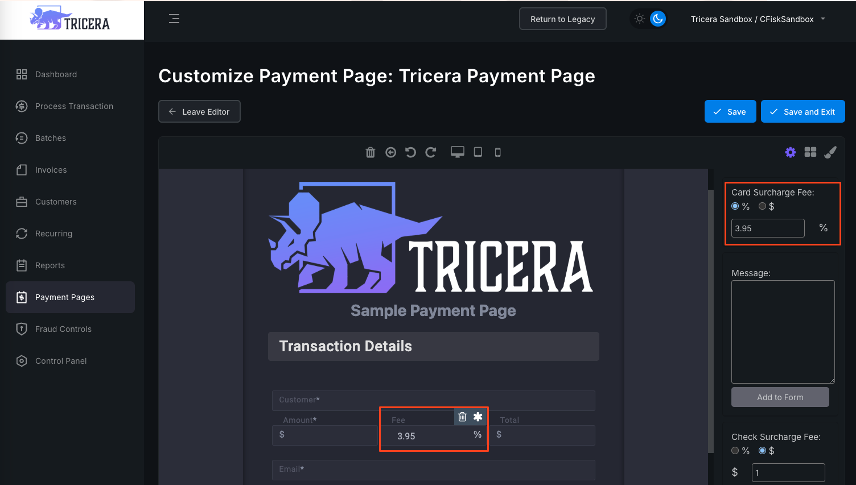
Most fields can be deleted or set to require by using the trash can or asterisk icons visible when a field is selected.
Certain fields, such as amount, surcharge, and description, when selected, will allow additional customization in the right sidebar, enabling you to configure these fields with preset values.
Once you’re ready to save the page, click Save and Exit in the top right corner.
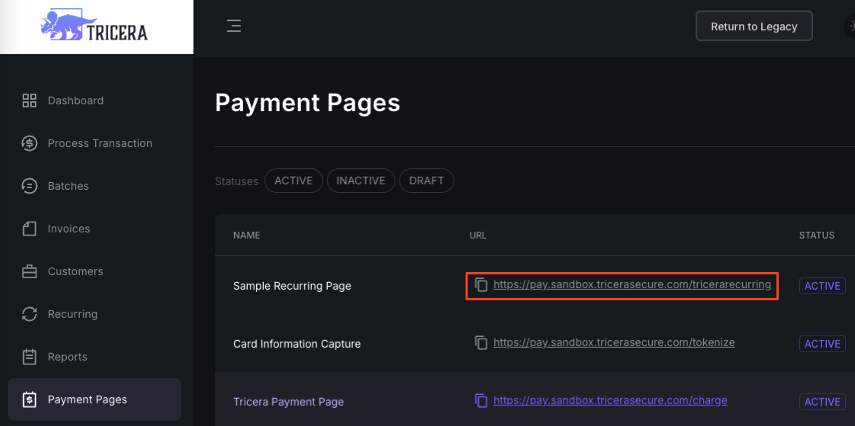
The page URL will now be listed under the Payment Pages tab.
The URL can be copied and provided to customers.
You can always activate/deactivate, edit, or delete a page by using the icons to the right of each page.


