Adding Payment Processing Credentials
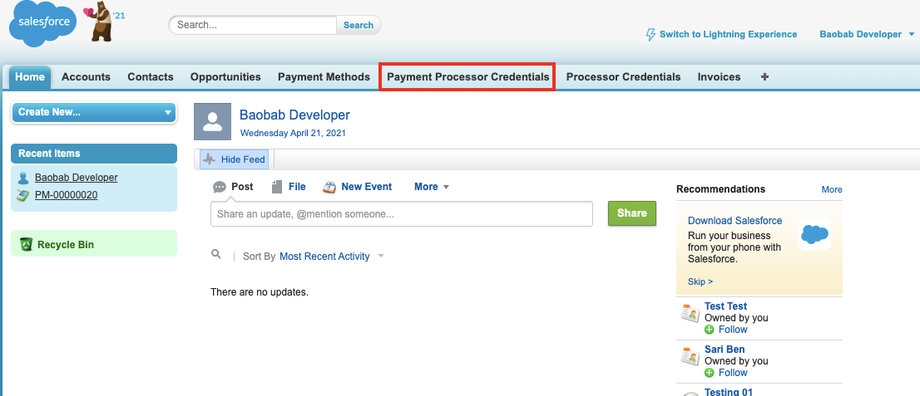
Once logged into Salesforce click Payment Processor Credentials.
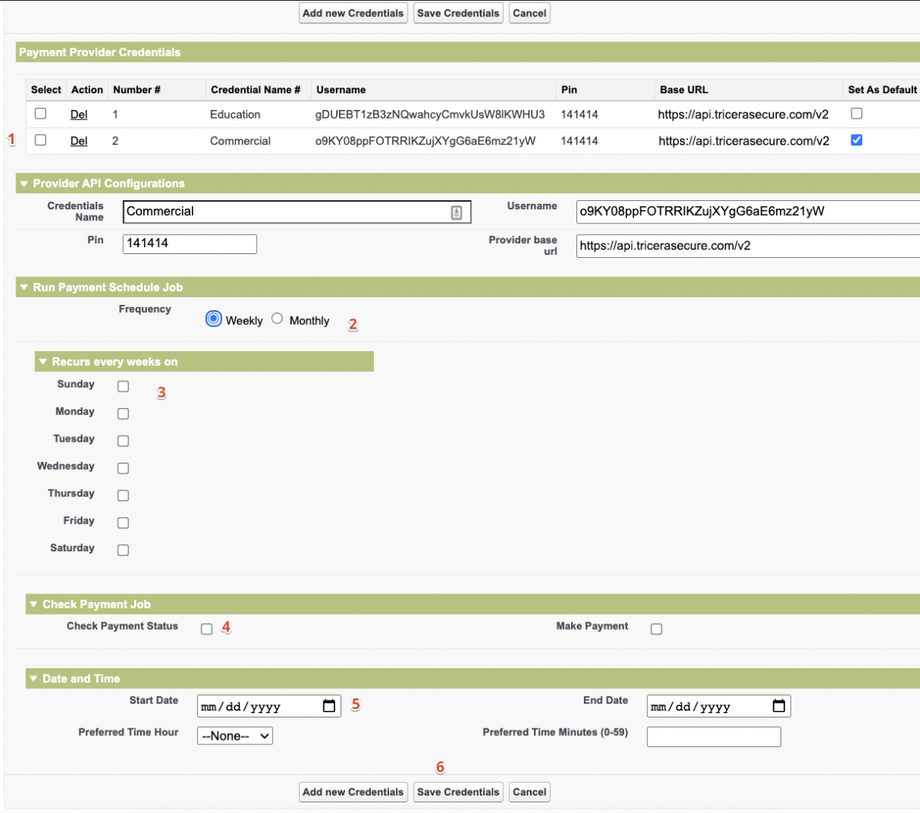
On the next screen click Add New Credentials and enter your source keys into the processing parameter fields:
- Credential Name = anything you choose
- Username = your source key
- PIN = source key PIN
- Provider base URL = https://api.tricerasecure.com/v2
To set a provider as the default, check the box labeled Set as Default.
Click Save Credentials.
Clicking on Add New Credentials will clear any existing details and allow you to add additional credentials.
Setting up a Scheduled Job
You can set a schedule to automatically process payments and retrieve the status of existing payments, or to generate invoices on a scheduled basis or ahead of time to be processed on a specific date.
You will need to set up a Payment Schedule Job from the Payment Processor Credentials page.
- On the Payment Processor Credentials page, check the Select box to the left of the credential for which you'd like to schedule to run.
- Choose if you would like to run Weekly or Monthly.
- Choosing Weekly will also allow you to set up a job every day by selecting checkboxes under Recurs every week on.
- Go to the Check Payment Job section:
- Check Payment Status: will check the status of existing invoices and tare not either settled or failed.
- Make Payment: processes invoices that have a payment date of 'today' and status not equal to cleared or failed each time the job runs.
- Schedule Recurring Invoices: generates invoices for opportunities that have been set up for recurring charges. Instructions on how to do this are detailed in Creating Invoices section below.
- In the Date and time section, you can define:
- Start Date: the date on which you would like this job to begin running
- End Date: the date on which you would like this job to cease operating
- Preferred Time Hour: the hour value for when you would like the job to process
- Preferred Time Minutes: the minutes value if not the top of the hour
- Click Save Credentials. The job will be visible in the list of scheduled apex jobs in your setup.
Creating a Payment Method
- Go to an Account or Contact where you would like to add a payment method.
- Add the Payment Methods related list to the page by editing the layout. We recommend the following fields:
- Record Type - Credit Card or Bank Account
- Card Number
- Account Number
- Expiration Month
- Expiration Year
- Routing Number
- Status
- Processor Credential
- Set as Default
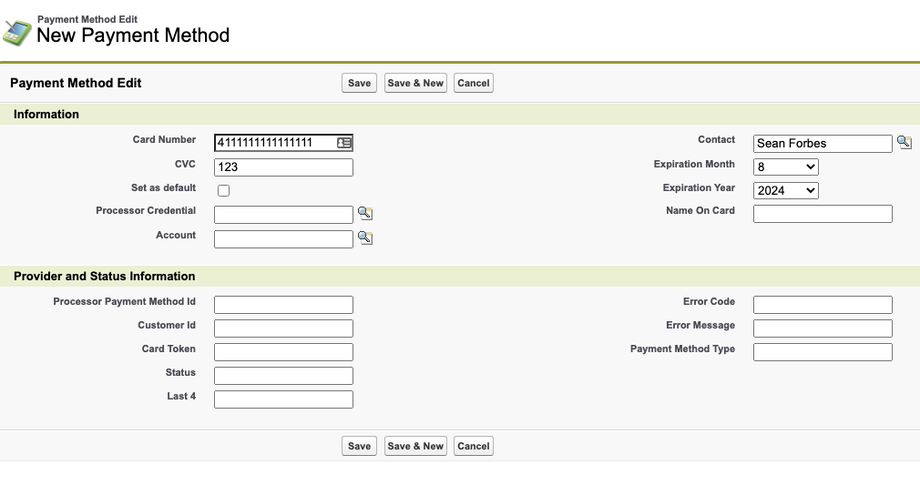
- Click New Payment Method and fill in the necessary fields.
- If you do not check the Set as default box and there are no other payment methods associated with that account/contact, this will be checked upon saving. It can be unchecked manually after saving if you do not want the account/contact to have a default payment method.
- Processor Credential will default to the Payment Processor Credential you identified as Default in the entry wizard if you chose to do so. You can also use the lookup to match it to a specific one.
- For credit cards, you will need to include the following information:
- Card Number
- CVS/CVV
- Expiration Month and Year
- Name on Card (is not required, but recommended)
- Status should automatically update within a few seconds. Approved means it can now be used to pay invoices.
- If the card is approved, the Card Token will automatically populate. This value will be used for transactions instead of sending exposed card information each time this payment method is charged.
- If your processor has an issue with the card for any reason, the error details will populate the Error Code and Error Message fields.

- For bank accounts, you will need to include the following information:
- Account Name
- Account Number
- Routing Number
- Account Type (checking or savings)
- Click Save
Creating Invoices
The Invoice object is used to capture charges. By default, PayLink treats Opportunities as the core billing object, and there are default functionalities that can be used to generate invoices of specific values and on specific schedules related to the opportunity. An opportunity is not necessary to charge a payment method, but only Opportunities have automation around calculating the value of an invoice or defining a schedule for the invoices to either be generated or processed. Invoices can also be associated with Accounts or Contacts. Opportunities will be covered directly after this section.
- Go to an Account or Contact where you would like to add an invoice.
- Add the Invoices related list to the page by editing the layout
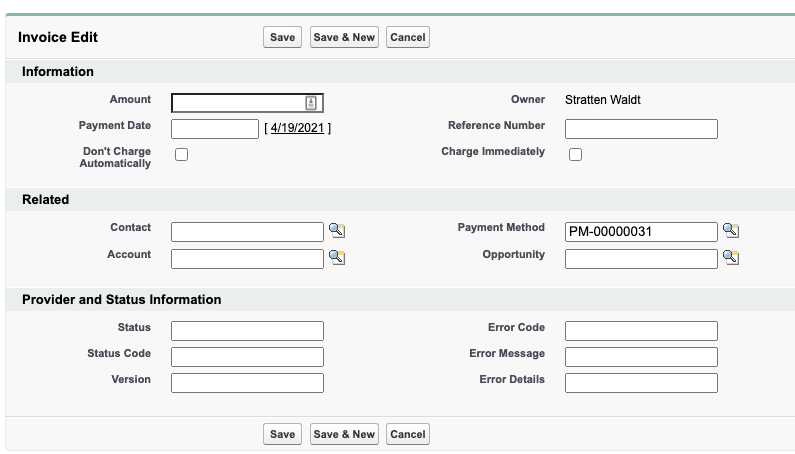
- Click New Invoice and fill in the necessary fields.
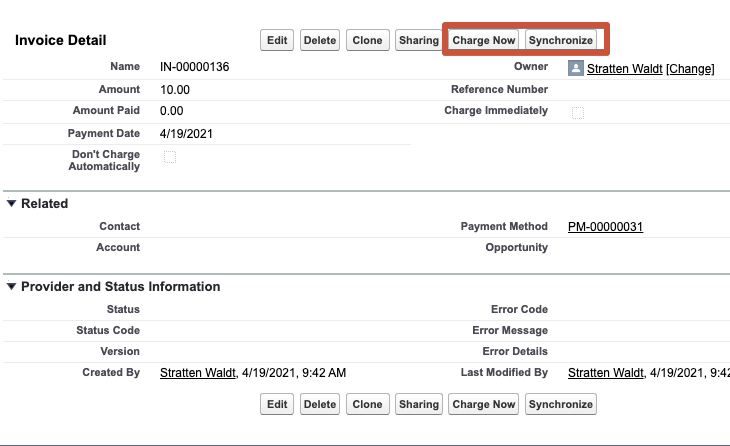
- Amount - the amount to be charged
- Payment Date - the date on which the invoice is to be charged
- Charge Immediately - if a new invoice is saved with this checked, the system will attempt to process the transaction immediately upon saving.
- Don't Charge Automatically - if this is checked, the invoice will be exclued from any automation that would normally charge an invoice on a specific date.
- Click Save
Invoices also have several buttons:
- Charge Now attempts to make a payment for the invoice using the associated payment method
- Synchronize gets the current status of the payment and updates it each time you click it.
Creating Invoices from an Opportunity
It is recommended that you add the fields Payment Method and Contact to your Opportunity page layout. Payment Method allows you to specify which card or bank account should be used for invoices associated with this opportunity. Contact is included because the opportunity does not have a standard lookup to the contact object.
When creating a new opportunity, you can choose to generate and process an invoice immediately. If you add the Charge Immediately checkbox field to your invoice layout, checking it and saving will automatically create an invoice related to the opportunity for the value in the Amount field. It will also attempt to immediately run the charge. If you do not specify a payment method, it will attempt to use any payment method marked as Default from the associated account or contact.
You can also create invoices ahead of time using either scheduled or recurring invoices (see below).
Scheduling Invoices
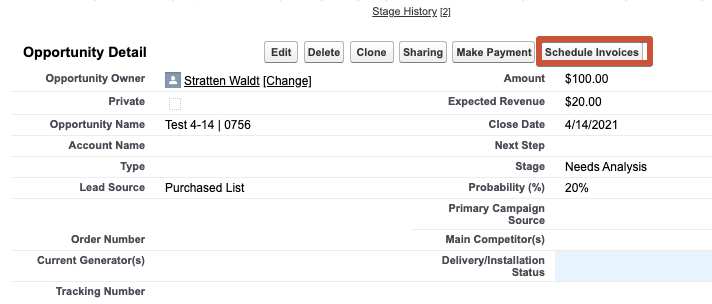
Click the Schedule Invoices button on the opportunity.
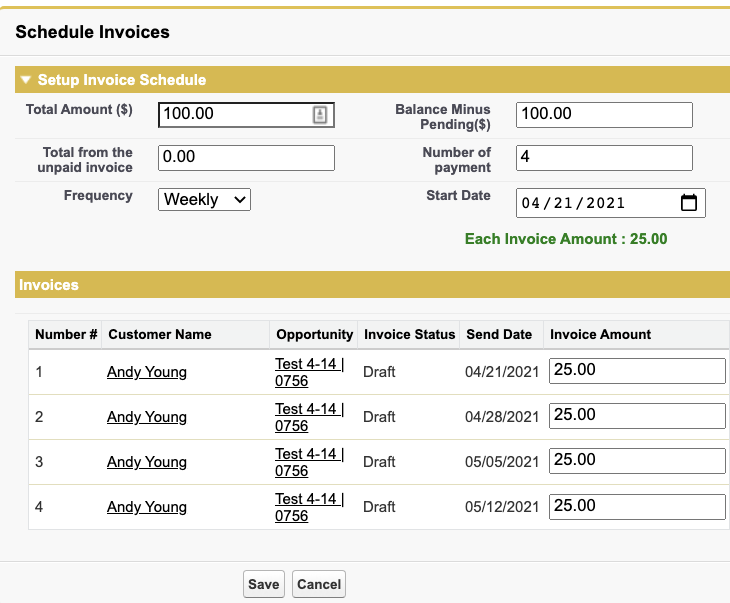
- By default, this will use the Amount field from the opportunity to determine the total value of the invoices you are scheduling.
- The calculated value Balance Minus Pending subtracts the total value from related invoices from the Amount field. This helps minimize the possibility of overpayment. This field can be changed manually if you would like to generate invoices totaling more than that value.
- Enter a value in Number of Payments to define how many invoices to use to distribute this value.
- Frequency lets you choose what timeframe should divide the payment dates.
- Setting the Start Date establishes the date for which the first invoice should apply.
Recurring Invoices (open-ended)
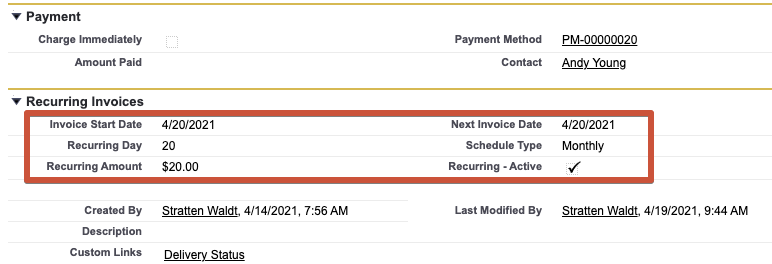
In order to set up recurring charges for an opportunity, you need to add the following fields to the opportunity page layout. ○ Invoice Start Date – the date on which you would like the first invoice to be generated and processed.
- Next Invoice Date – the next date on which an invoice should be created and run. This will increment automatically when an invoice is generated for a specific day.
- Recurring Day – either a day of the month or a day of the week. If the day of the month is not available for a specific month (such as 31 for February), it will run on the last day of that month.
- Schedule Type – lets you define the frequency with which the invoice should recur: Daily, Weekly, Monthly, or Annually.
- Recurring Amount – the value for each invoice.
- Recurring - Active – check this box to activate the recurring invoices. This will work in conjunction with the Schedule Recurring Invoices Check Payment Job type.


